Devices synchronization
Wispar has an optional cloud syncing feature to synchronize your database on multiple devices. It uses PocketBase to mirror the app's database.
What is synced?
| Feature | Status |
|---|---|
| Articles (Favorites & Hidden) | ✅ Synced |
| Journals | ✅ Synced |
| Saved Queries | ✅ Synced |
| Custom Feeds | ✅ Synced |
| EZproxy URLs | ✅ Synced |
| Downloads (PDFs) | ❌ Local Only |
| Translations & Graphical Abstracts | ❌ Local Only |
| App Settings | ❌ Local Only |
You can either use Wispar Sync, a hosted sync service, or self-host the sync backend to stay in control of your data.
Wispar Sync (hosted)
Wispar Sync is the easiest way to keep your devices in sync without managing any infrastructure.
Before choosing this option, please take the time to read the Privacy policy.
1. Create an account
- Open the Wispar app and navigate to Cloud sync settings.
- Ensure the toggle is set to Wispar Sync (this is the default).
- Tap on Need an account? to switch to registration mode.
- Enter your email and a strong password, then tap Sign up.
2. Verify your email
- For security reasons, your account must be verified before you can start syncing.
- Check your inbox for a verification email from Wispar.
- Click the verification link inside the email.
If you don't receive the email, you can use the Resend email button in the app (available after a failed login attempt with an unverified account).
3. Sign in and sync
- Return to the login screen in Wispar.
- Enter your credentials and tap Login.
- Once authenticated, your data will begin its initial sync.
- You can toggle Background Sync to allow Wispar to keep your data updated automatically while you are using the app.
Syncing only happens when the app is open.
Self-hosted
Do not expose your PocketBase instance to the internet unless you are aware of the risks and know what you are doing!
-
Download PocketBase: Download the latest executable for your operating system.
-
Launch the server: Open your terminal in the folder where you downloaded the file and run:
./pocketbase serve -
Initial setup: Access the dashboard at
http://127.0.0.1:8090/_/to create your initial admin account. -
Prepare schema: Download or copy the tables.json file from the Wispar repository.
-
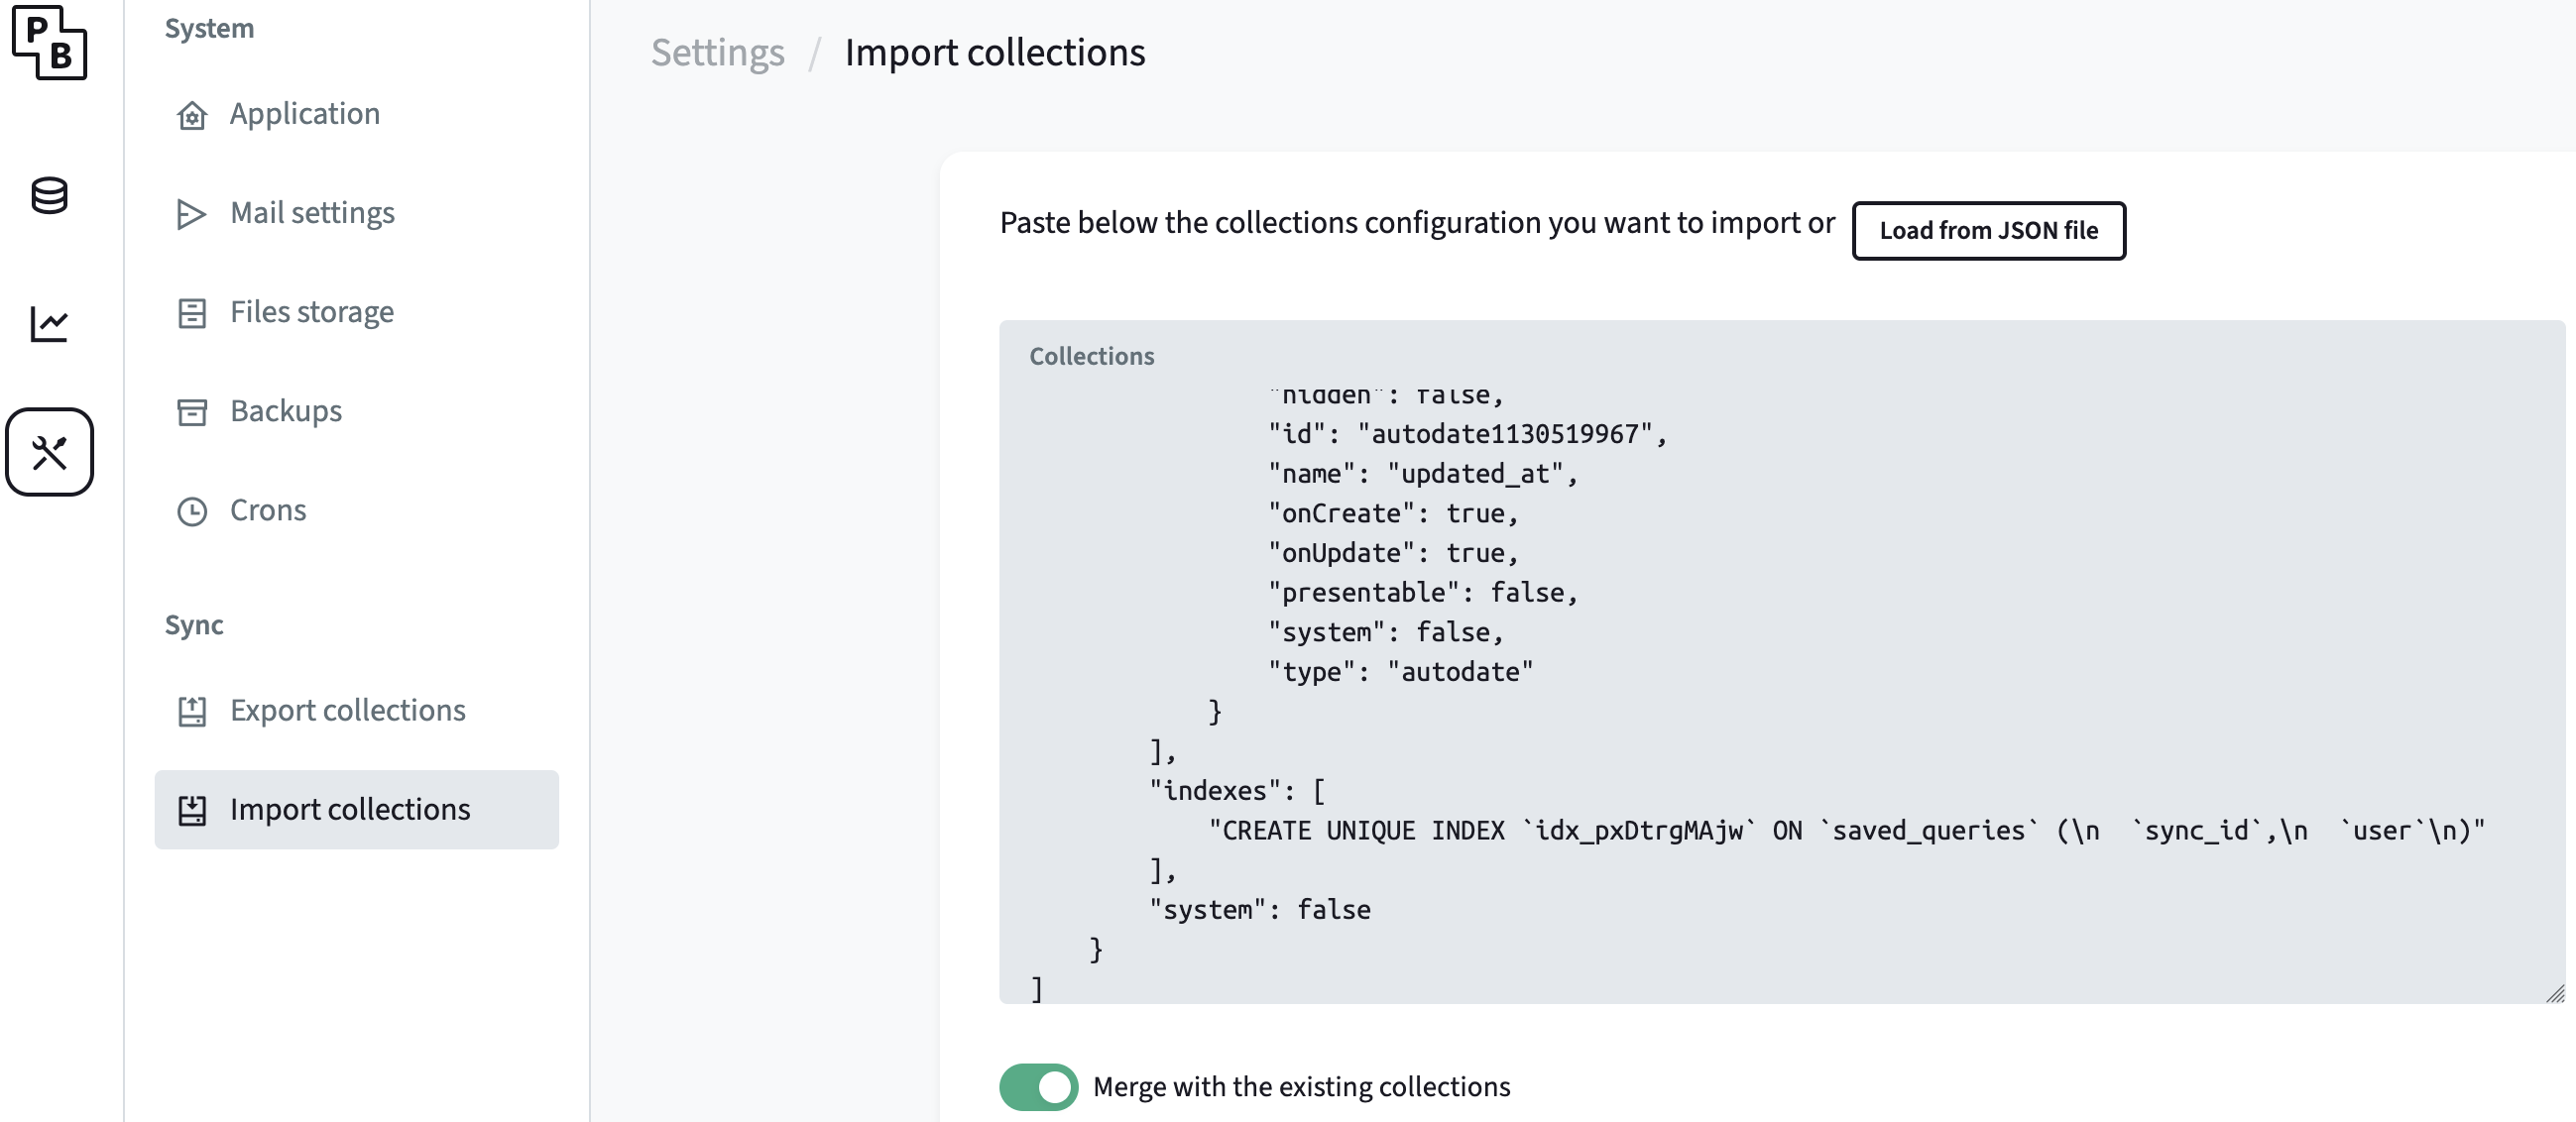
Import collections: In the PocketBase sidebar, go to Settings > Import collections.
- Paste the JSON content or upload the file.
- Ensure "Merge with existing collections" is toggled ON before clicking Import.
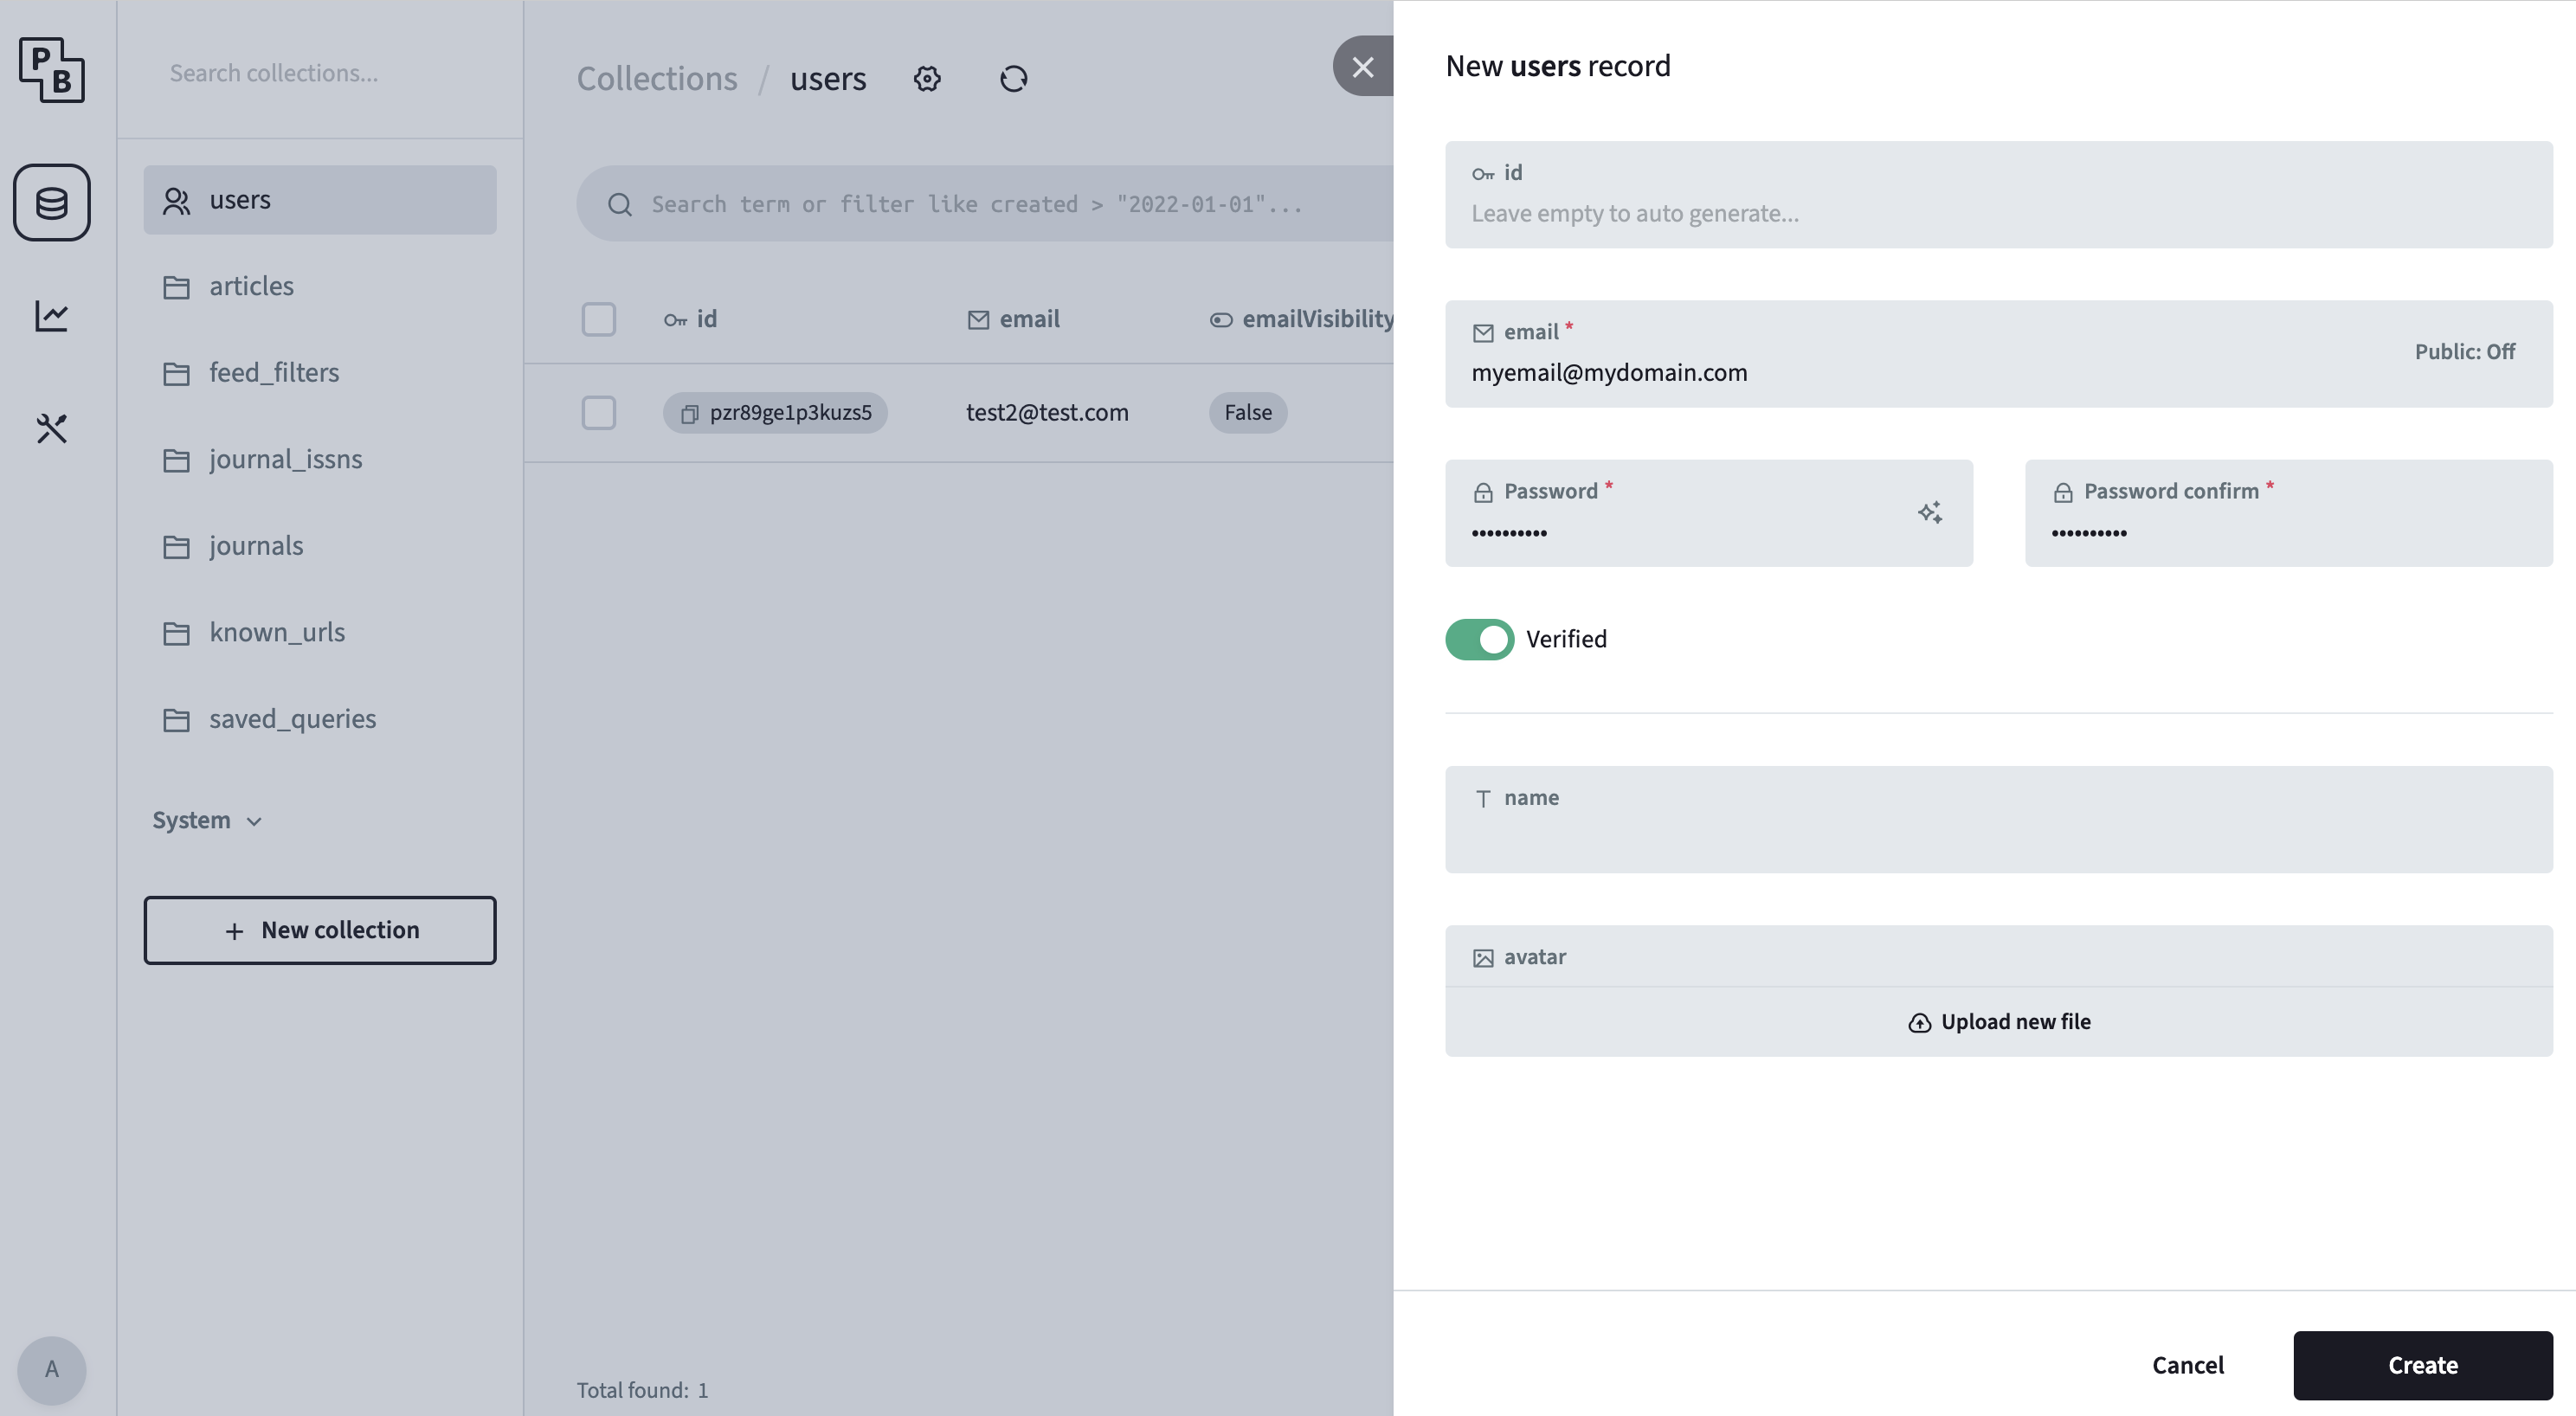
- Create your Wispar user:
- Navigate to the Collections menu and select the users table.
- Click + New record.
- Enter an email and password. (Note: The email doesn't need to be real unless you plan to configure mail settings later).
- Important: Toggle the Verified switch to ON. If this is off, Wispar will reject the login.
- Connect Wispar: Open the Wispar app, select Self-Hosted in the sync settings, and enter your Server URL (e.g.,
http://your-ip:8090). That's it!